Wednesday, February 2, 2011

Year of the Rabbit


Tomorrow marks a new year - the year of the rabbit! Rabbit people are calm, conservative, detail-oriented, graceful...things that I am not. They also tend to get along extremely well with others. Again, something I do not do. Thank goodness I was born in the year of the horse. Horse people are impatient, rarely listen to advice, good with their hands, and have contradictions in their character. Yup, that pretty much describes me. As my husband and he will definitely agree.

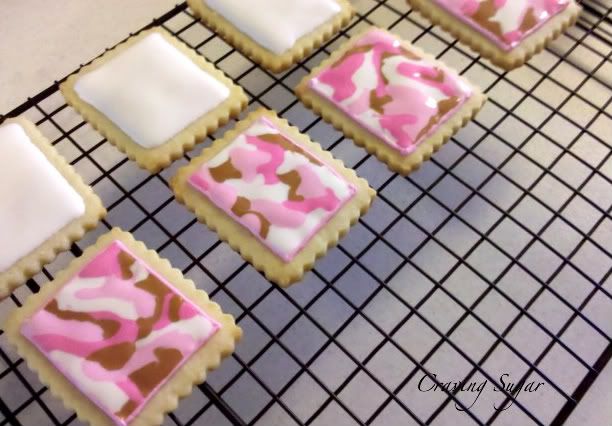
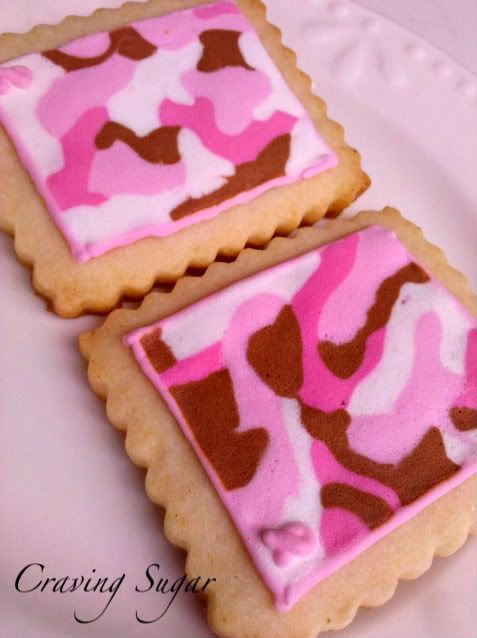
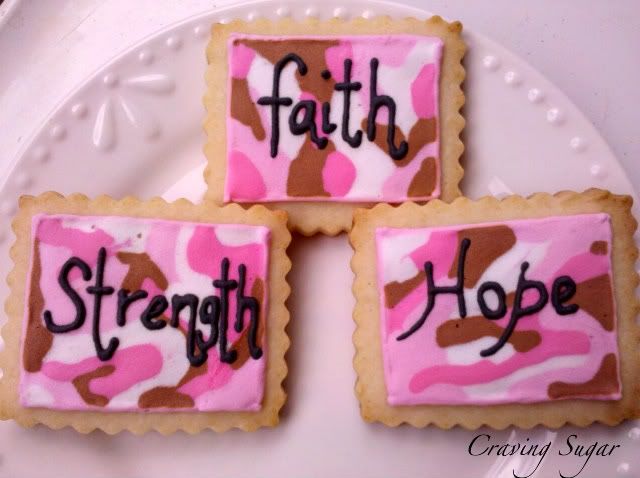
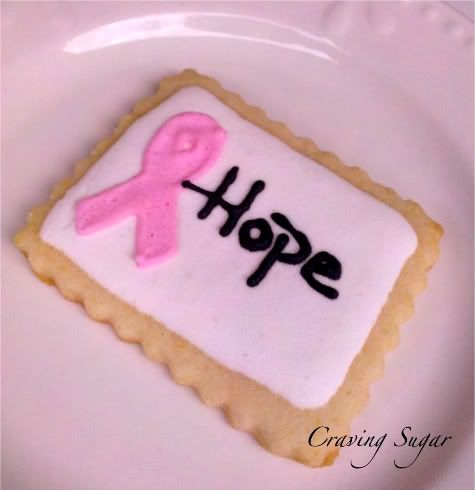
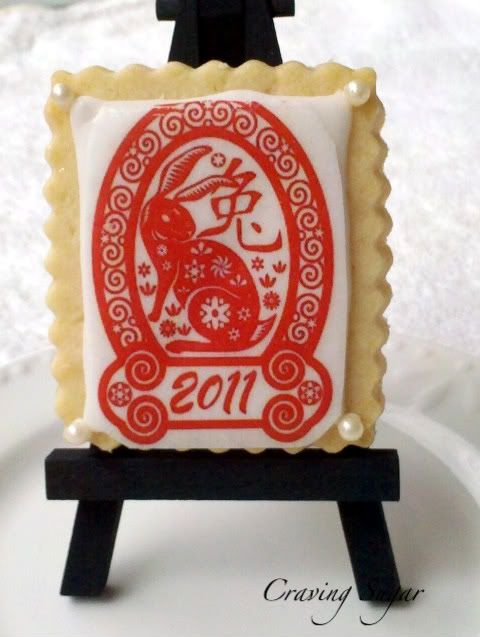
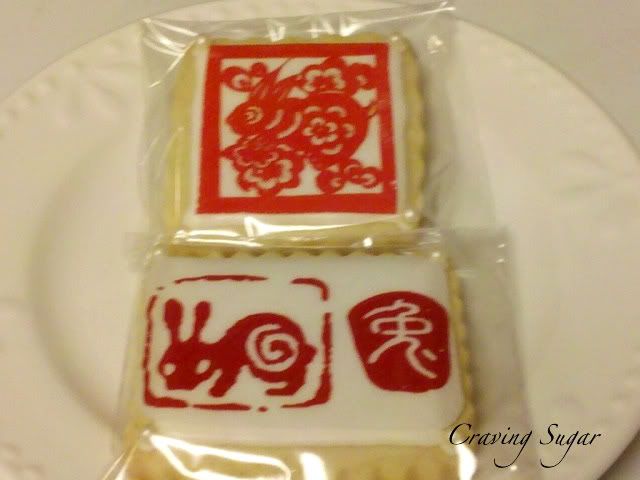
To celebrate the Chinese New Year I decided to try a new medium - wafer paper. The paper is easy to use. Since I don't have a printer to print edible images I went ahead and purchased paper that already had the images printed on them. To use, just cut your paper to the desired size, brush a thin coat of corn syrup onto your frosted (either RI or fondant will work) cookie, and placed the paper onto the cookie. Turn the cookie image down for 30 minutes, then turn over and allow to dry completely for 12 hours. That's it! Once the cookie has dried you can embellish the cookie by adding decorations - maybe more icing, sugar pearls, really, whatever strikes you.


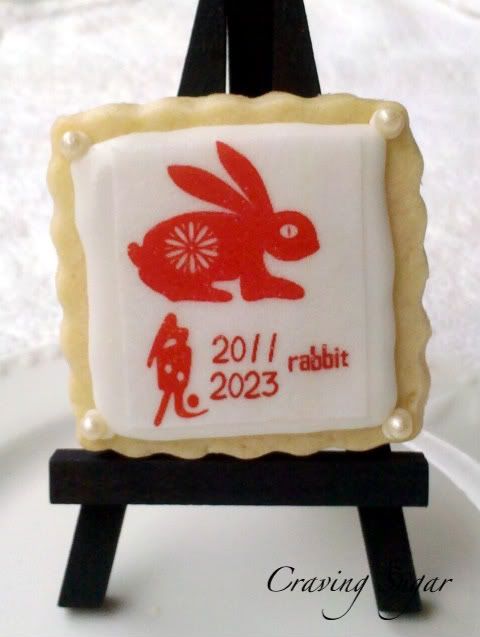
Why yes, that is a little cookie easel!

Once it's complete you have cookies that look like you slaved over them for hours!


Kung Hee Fat Choy! (That's happy new year.)

Saturday, January 15, 2011

Fight like a girl!


I was on FB the other day and I noticed a pic of a family member that she had titled it "Fight like a girl" and it was an awesome shot of her with fists raised and a pink hat on, ready to take on breast cancer. It inspired me to make some cookies for her and since I wanted to try out a new icing recipe from Bake at 350, the timing was perfect.

I decided to bring back the camo cookies that I had made for my brother's last deployment but make them girly and pink (BTW, I have an awesome pair of pink camo cargos with an embroidered dragon on the back. Love them...except they shrank a lot in the wash and no longer fit. Do you think if I could stretch them back out if I shove myself into them? The washing machine and I need to have a serious conversation as it keeps shrinking my clothes.)

Back to cookies, camo, all the way!

It was my first time using this icing and while I loved the consistency when it was first mixed - it reminded me of marshmallow fluff - I wasn't too fond of it after I thinned it out. Maybe it was just me but I ended up with a lot of bubbles once the cookies had dried as you can see below. Also, even after 24 hours the icing wasn't as stiff as I was used to. When I packed the cookies up the writing on the cookies got smashed and let bits of black frosting all over the cookie. It definitely was not up to my standards but I'm hoping she will like it anyway. It's the thought that counts right?

See the little ribbon in the corner? Little last minute detail. And sadly, you can see where the bubbles popped in the icing as well...a lot.

Words of encouragement cookies.

This cookie was based off the hat they were wearing in the pic.

All packaged up and ready to go. Yup, coordinating ribbon too 'cause I'm cool like that.

My overall verdict on the other icing recipe is that it's a hung jury. I haven't any problems with the recipe that I normally use so maybe if it ain't broke, don't fix it? I just wish I knew what happened. Even after I thinned the icing to flood I let it sit and got rid of the bubbles before transferring it into bottles/bags. I still have some icing left over and some dough in the freezer so maybe I'll give it another shot. Honestly though, I think Antonia's recipe has a hold on me and my squeeze bottles.

Thursday, January 13, 2011

Hello, hello! It's been a while. :o(

Oh my gosh, I am SUCH a bag blogger! In my defense - I went on a quick trip, I've had friends in town, I've been sick, then my husband got sick and worst of all, my Kitchen Aid died. YES, it died! Can you believe it?? KA's are not supposed to break or die, especially not after only 2 quick years. I must have gotten a defective machine. At least I still have my back-up KA although I have to say that after using the KA Pro, my poor back-up machine seems doll sized.

Here are some of the projects I have tried out since you saw me last:


Simple Halloween cupcake guaranteed to make the recipient smile. (How could you not? Just look at that face!)


My first attempt at playing with my KopyKake. In my typical fashion, I of course had to have something difficult in there. It isn't as clean as I would like, even after using a 0 and a 00 tip but it still turned out fun. If you don't happen to agree just nod your head. I won't be able to hear you and will assume we are on the same page.

Bacon Pecan Caramel Corn. 'Nuff said. Yum!

Bacon Caramel - yes, I was definitely on a bacon kick. Bacon goes with everything. Whoever says different needs a piece of this candy, STAT.

Caramel Pillows - marshmallows with caramel dipped in whatever yumminess you have on hand. These are toffee, coconut, and pecan. Now, I'm not a huge fan of coconut but these smelled so good! They also travel well. I sent some of these guys to Colorado and some to the East Coast and they all made it okay. Of course, everyone is snowed in on the mainland so that could have helped them stay fresh too.


That's what I've been up to the past few months. Hopefully I will have a new mixer that isn't doll-like. I have some fun (I think so anyway,) ideas in my head and I would like to play with them. Also, I'd like to try my hand at cakes again.

Here's hoping for a great new year! If not, Chinese New Year is on February 3 so maybe I'll just ask for a do over...

Sunday, October 17, 2010

Cupcake Cupcake Toppers


I'd like to introduce you to someone. His name is Teeny. Full name: Teeny Weeny Cupcake. Isn't he adorable with his swirl of buttercream, colorful beads and his little M&M cap? Teeny has a friend whose name is Standard Size Cupcake AKA Stan. See - here they are just chillin'.


The other day these two were hanging out in my kitchen and Teeny was griping about how sick and tired he was about being so small so Stan, being the nice cuppie that he is, said to Teeny "Why don't you hop on up. It will give you a new perspective." You know, kinda like that van commercial where the guy has his daughter move up from the back of the van to the front where her brothers sit and she's all amazed. You know the one I'm talking about. Anyway, Teeny hops up and a whole new cupcake is born!


The nice thing about this new cupcake? Teeny is actually a Reese's miniature peanut butter cup! To make this super simple cupcake with the cupcake topper, just unwrap the mini cup, pipe on a swirl of buttercream or whichever kind of frosting you are using and plop him onto your standard size frosted cupcake and decorate with sprinkles and you are done! (In case you're wondering, I used M&M Mini's on the top of the pb cup.)

A word of advice: if you are leaving the papers on the pb cup, just make sure your tasters know. For some reason two of my tasters decided to pop the mini cuppie in their mouths as is. Don't worry, they figured it out when they tried to chew paper. Unless you think they need more fiber in their diet. Completely up to you.

Now, I'm off to play with my new toy. Hopefully my cookies turn out the way I want them too. If it does, you know I'll share it!

Oh, and that new perspective? It gave Teeny enough confidence to find himself a girlfriend. She's a sweetheart of a girl - all yellow cake with a sweet strawberry middle. They make a cute couple, don't they?

How crazy it this - I let life grab a hold of me (followed of course by the standard issue holiday cold) and I've neglected this poor little blog only to come back and find that the Cookbook Queen herself has somehow seen this post! Find her original Cupcake Cupcake Toppers post here!

As for what I'll do next...well d'uh!

**Waves frantically** Hello Cookbook Queen from Hawai'i! I'm sorry it's taken me so long to respond!

Monday, September 6, 2010

Logo Cookies


Have you ever tried to put a logo on a cookie? That's been my project for the past few days and I have tried several different methods to determine which one I like the best and by several, I mean about 3 and there's another one that I'd like to try but it involves a sizable expense so I'm not sure when I'm going to experiment with that. Out of the ones I've tried so far, there is no clear favorite. Isn't that sad? I suppose that means I need to keep going. *Insert eye roll here.*

I ended up on this path because of a FB request for cookies with a simple logo on them. I could have free-handed the logo (just a simple letter) but as usual, I took it upon myself to try new tricks out. I ended up creating my own stencil which seemed easy enough - image, stencil sheet, pen and an exacto knife.

Here is my cookie version:


Now, because I apparently don't know how to keep things simple, I suggested 2 cookies for this party. One to signify where the guest of honor came from (above) and one for where he was going. For those, I tried the stencil thing again...it didn't quite work. The logo was too small for what I was doing (baseball cookie) and the RI said "Heck no" and smeared when I attempted to use it with the stencil. Going thing I tried it on some parchment first!

These baseballs were done free-hand but because of the size of the logo I drew them on first and went back with a teeny tiny tip to pipe over and fill them. I only did 2 dozen of those guys but let me tell you, my shoulders hurt when they were done! After piping all of the logos I went back with the red bag to add the stitches. As far as baseballs go though, they are pretty cute!


Details make the difference, don't you think?


Waiting to be bagged.

I ended up with leftover dough...okay, that's a lie. I was still in baking mode so I whipped up another batch, this one with my favorite mystery flavor (sorry, but plain Jane sugar cookie is just not my fave,) and decided to play with another cookie cutter. I had a special cutter custom made last football season and didn't get a chance to play with it so without further ado, here are the cookies made with my very own super special cookie cutter!


I had the UH logo made in 2 sizes - a 2.5" and a 4" and I'm not going to lie, they were pricey (copper cutters!) but I love them. For serious.

I was also thinking of some friends who were at the MSU game and since I had green RI ready to go, I decided to try my hand at a Spartan cookie. Here it is, free-hand.


Sure, my "S" is leaning towards being a "5". I believe my RI was too runny but hey, at least my Spartan looks good. Right?

My final (for now) experiment with logos was a USC cookie. While I'm not ready to discuss that technique yet I will say that it worked much better this time around than it did the last time I tried. Maybe because I had more patience this time? (Funny, off track story. I bought new sunglasses - in and out of the store in 5 minutes, hah! Sales clerk gets me new glasses, I look at the box and it says "Impatient" on it. I ask why and she tells me that's the name of the design. How perfect is that for me??! My husband got a good laugh out of that and I haven't thrown the box away yet.)

Anywho, back to cookies, I need to work on that particular technique again but I'm think I'm close to really getting the hang of it! Thoughts?

And one more UH pic to say goodbye, just because I can't let the USC pic end this blog post. =o)


Saturday, August 28, 2010

Seashells, seashells, by the sea shore


You got me, that's not how the tongue twister goes. But, I've got something better than a tongue twister. I've got cupcakes! Not just any old cupcakes. I have sea shore cupcakes! These little cuppies were very simple to make. All you need are cupcakes, buttercream, a chocolate mold, and some chocolate wafers.

Melt your wafers using your preferred method - microwave, melting pot, or double boiler - and pour the chocolate into your mold. Pop the mold into the freezer for the chocolate to set. For me it took about 20 minutes because I was impatient. Then you pop those suckers out and lay it onto your swirl of frosting.

Now, you'll notice my shells aren't monotone. Personally, I'm not a fan of pure white shells. Why, you ask? Have you been to the beach? Did you ever find a snow white shell? In case you're wondering, I really do mean on the beach, and not something found in a store that was probably bleached.I thought not. Most shells aren't pure white. They have some color to them - so why should mine be any different?

Regardless of how you like your shells, these cupcakes are a great way to say goodbye to summer and ready yourself for fall...unless of course you live in Hawai'i and it's summer all year round!

Tuesday, August 10, 2010

The danger of reality baking tv


Do you watch reality tv? What about shows such as Cake Boss, Amazing Wedding Cakes, etc? I do. I can spend an entire weekend watching them even if they are repeats. Yes, it's horrifyingly true - I have no life. Watching these shows does 2 things: it teaches me how to cake and it gives me crazy ideas about ingredients that I obsess over.

One such show is DC Cupcakes. Granted, I only watched half of an episode but it was enough. The sisters were shopping and tasted hibiscus syrup. Yes, hibiscus! Who knew hibiscus was edible? I grew up around the flower (how could I not, being from Hawai'i?) but I never thought to eat one. Of course I then needed to find some syrup. That's the advantage of working for a grocery store - I went to the office and bothered - *ahem* excuse me asked - the Natural Foods department if they had any. No luck there. So then I asked the Gourmet division, which, incidentally share the same assistant so yes, I bothered her twice. No luck. She did however tell me that I should stop watching food tv because I would always ask her about specialty ingredients which we never seem to have.

So what's an obsessive baker to do? Figure out how to make my own syrup of course! I found some dried hibiscus (which was actually very easy to find) and experimented. The dried flowers turned my syrup into a pretty pink color so I went with pink macaron shells with a white chocolate/hibiscus ganache. Unfortunately the pink syrup didn't translate well with the white chocolate so I had to add some color to pink it back up. I also ended up with lilikoi macarons and a...wait for it...this is a long one...a chocolate hazelnut macaron with vanilla bean/fleur de sel caramel filling.

I'm thinking macarons are going to be a part of the Christmas gifts this year. Yes, I know it's August but really, it's right around the corner and I've got more flavors in the works. Besides, if you're over on the East Coast, wouldn't some tropical flavor macarons make you feel warm and fuzzy inside while it's freezing and blustery (using my Winnie the Pooh words here,) outside?

And now I am off on vacation, heading towards what we Hawai'i folk call "the 9th island," then it's right back here to deal with more egg whites and almond flour. I'm warning you - there may be more macaron posts ahead!

Oh and I also have my version of a maple bacon cupcake but more on that later. My flight is tomorrow and I still haven't packed. Oops!